We were all set to start tiling, but got a call from our HOA president that there was a huge water leak in the garage below our bathroom. <Dramatic Music>
The next day was spent dealing with a plumber and the HOA to figure out that the unit above us had a leak that was dripping down to our floor and seeping below into the garage. In fact, you could hear a "drip drip drip" noise behind the wall of our bathroom.
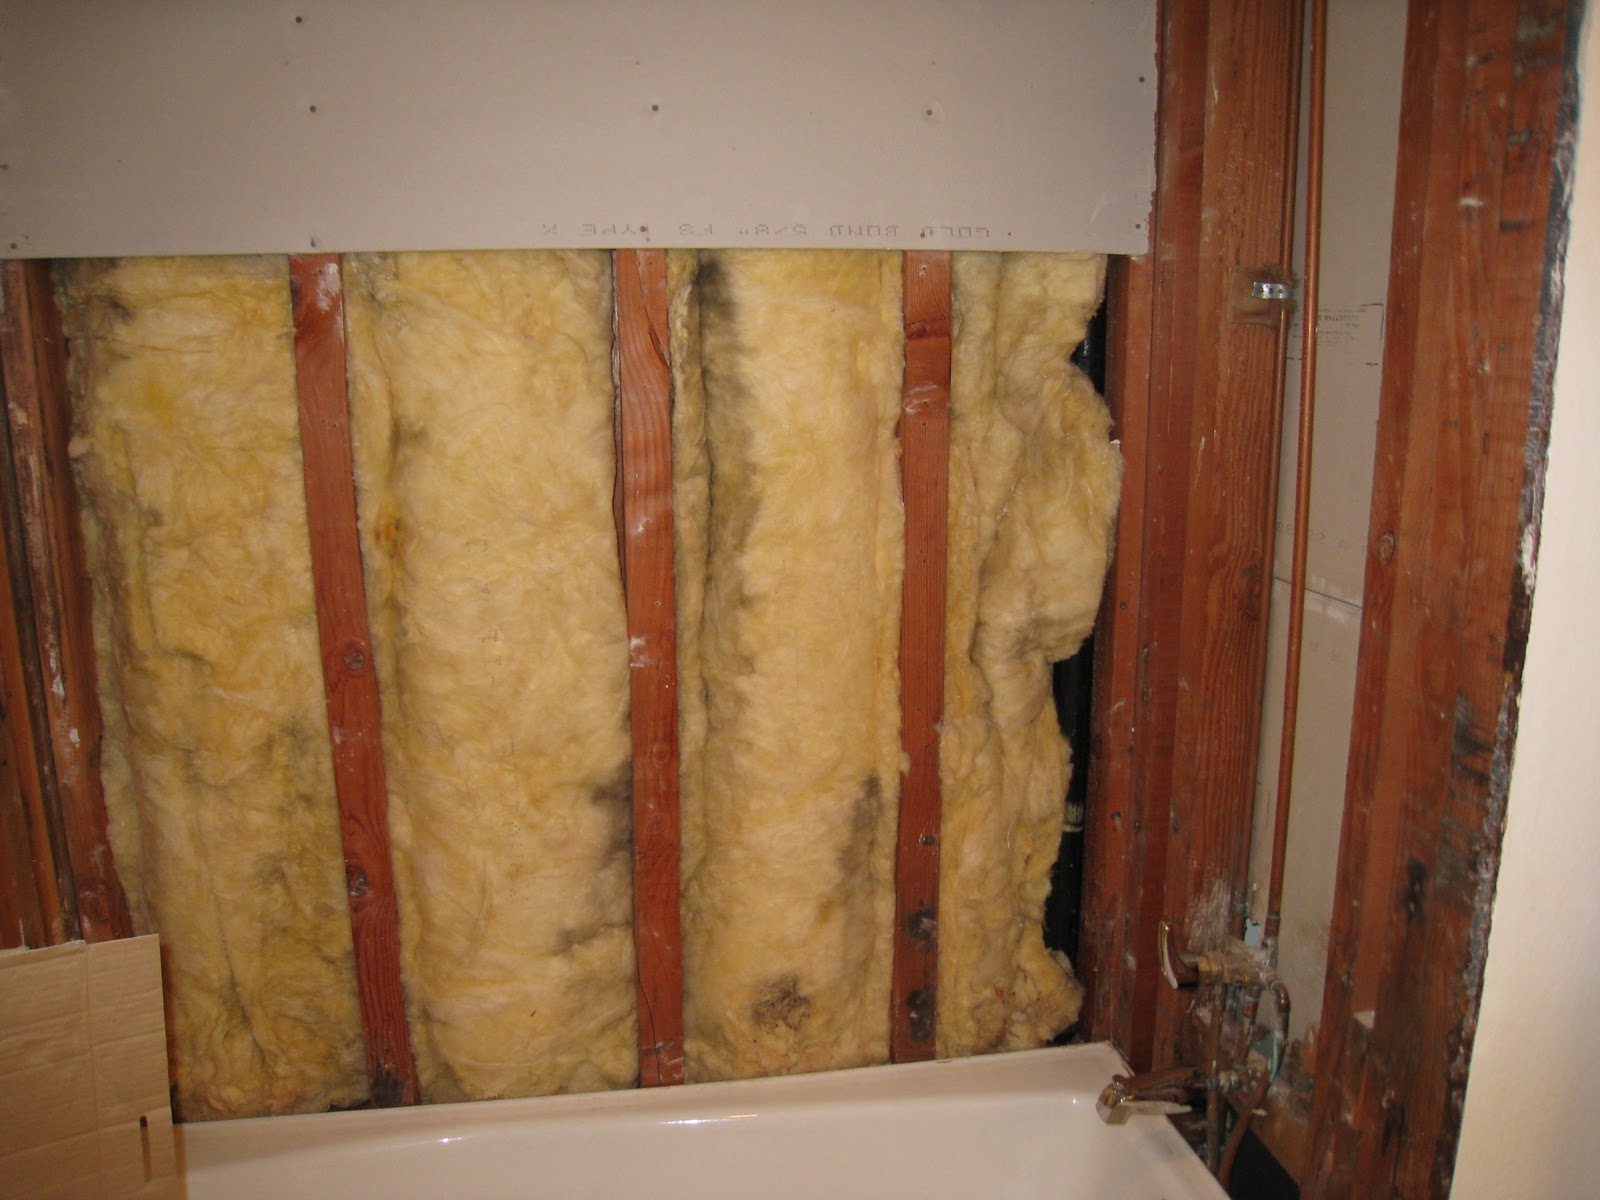
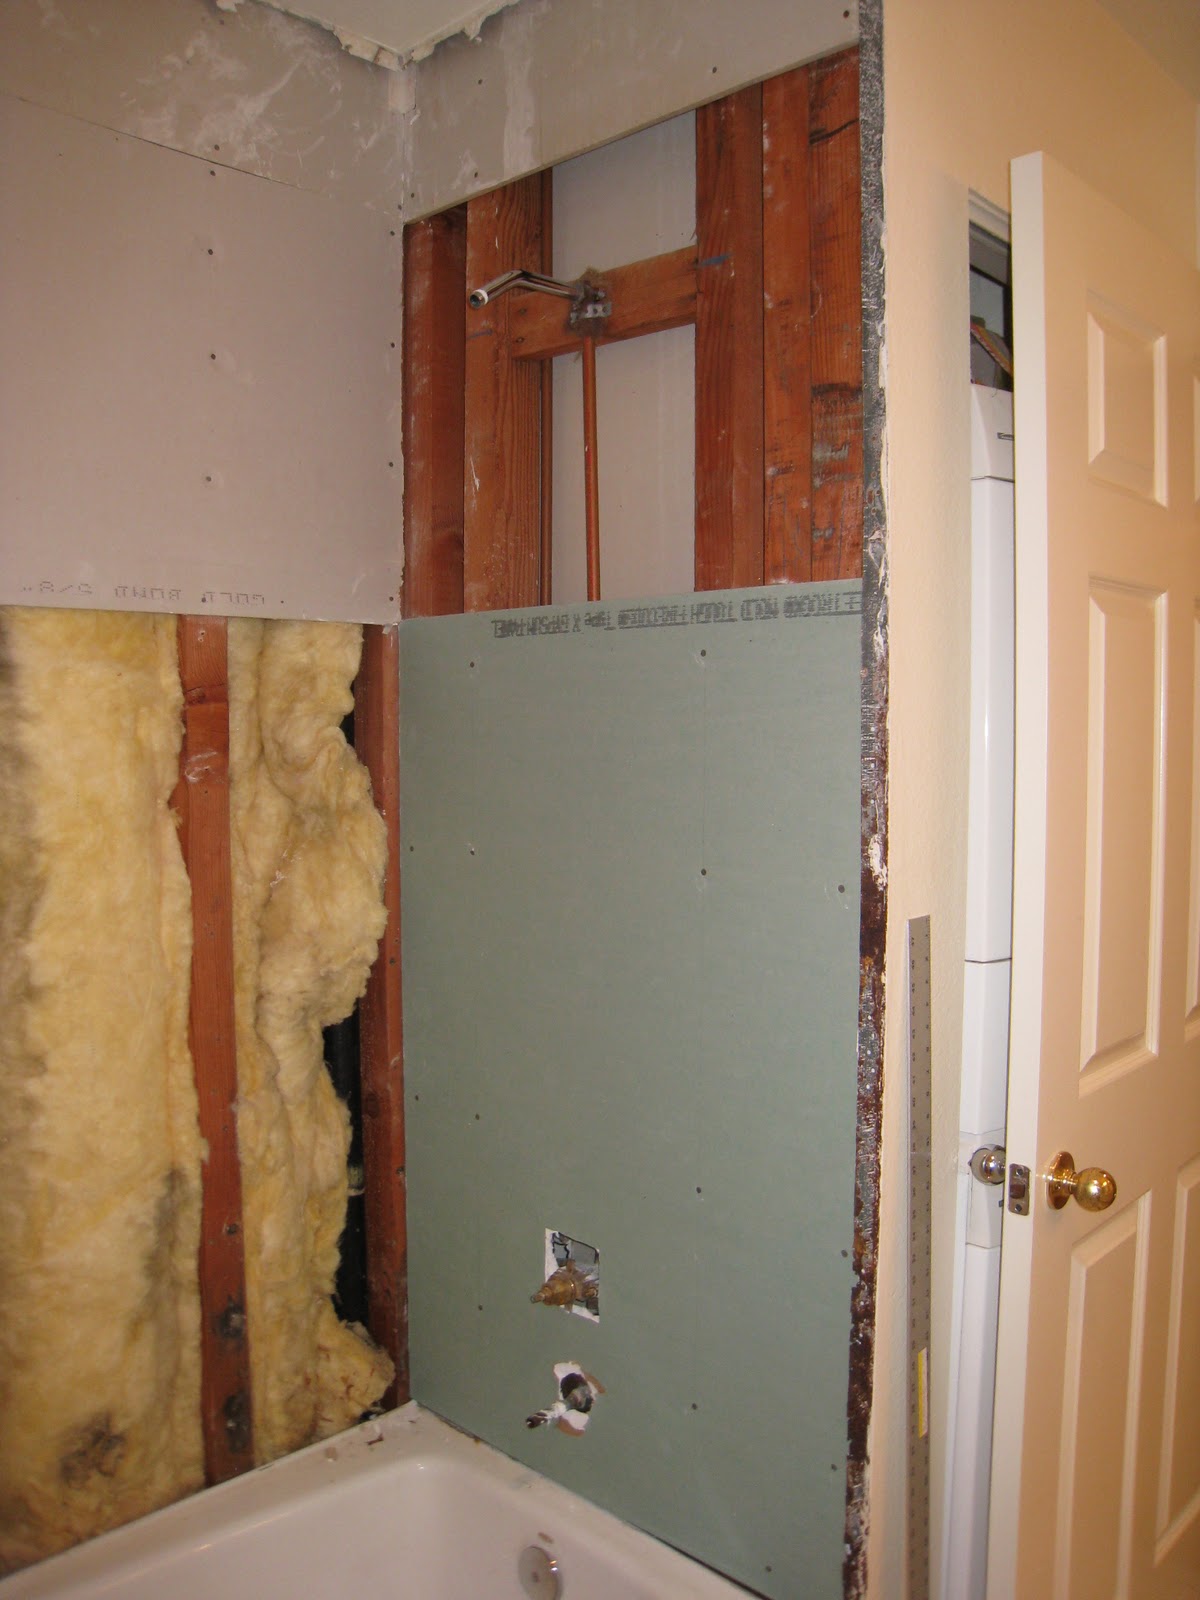
Contractors came out and tore out an entire wall (behind the toilet) and installing these huge industrial dryers in the bathroom to dry out our wall/floor.
You can see some water damage in the wood flooring behind the wall, too. Now... we have no wall.
At least this means the HOA will pay for repainting the bathroom (plus the new wall)!
We finally begin tiling...
Jan 30, 2011
Jan 20, 2011
Tile Makeover
This is what I had been anxiously waiting for since we started tearing down the tiles... picking out new tiles! Easier said than done, though. There are just SO many options. We had to decide on a look first. Modern? Classic? Marble?
We went to a lot of different tile specialty shops and saw some really pretty tiles, but they were pretty pricey.
Then, we realized we were limited by the way we did our cement boards. They stick out a little over the wall.
So, we realized we couldn't get tiles that need to be flush with the surrounding wall. We needed a curved end tile, similar to the style we just tore down!
In the end, we ended up at Home Depot to get the white Dal tiles that had curved end tiles. But, we did change it up a bit by getting rectangular subway tiles instead of the square ones we just tore out. Here's a pic of the tiles we bought online...
And we got some pretty accent tiles, too!
I was deciding between green ones or blue ones and went with green. Relaxing.
We bought some tile spacers to make sure we left enough room for the grout between the tiles. We're all set to start tiling! Except... disaster strikes...
Jan 9, 2011
Cement Boards Up!
After putting up the greenboard, another waterproofing layer of cement board goes up.
Eric had to use special screws to get these cement boards in place.
Again, as with the greenboards, we had to cut these to the right size to make sure they fit properly. Surprisingly, just score and snap and they break off into pieces. It wasn't as easy as it was with the greenboard and a lot messier, but it wasn't all that difficult, except around the waterspouts.
We also made sure that there was a slight gap to prevent water from being absorbed up into the cement board from the tub layer.
Next time... tile selections!! Seriously, the best part of remodeling... picking your new look.
Dec 28, 2010
Bathroom Surgery
We stripped off all the tile and the moldy drywall layers to find the guts of what makes up any building.
We decided it would be okay to keep some of the top section of the original drywall because that wasn't damaged by water over the years. You can see a bit of gray at the top of the picture above.
We bought drywall boards from Home Depot and transported several 5'x6' boards in my little Honda Fit! The drywall boards, also called greenboards, come in different thicknesses. Ours is 5/8". Obviously, the boards were bigger than the spaces we needed to fill so we used a giant metal ruler to measure out the necessary sizes and scored the drywall to the right size. Then, SNAP, we just broke the drywall into the right size. Neater than I thought it would be. We used special screws designed for drywall to fasten the boards to the wooden posts.
Soon, our walls were no longer naked.
Next part was a bit more difficult... sizing and putting up concrete backer boards.
Naked bathroom |
We bought drywall boards from Home Depot and transported several 5'x6' boards in my little Honda Fit! The drywall boards, also called greenboards, come in different thicknesses. Ours is 5/8". Obviously, the boards were bigger than the spaces we needed to fill so we used a giant metal ruler to measure out the necessary sizes and scored the drywall to the right size. Then, SNAP, we just broke the drywall into the right size. Neater than I thought it would be. We used special screws designed for drywall to fasten the boards to the wooden posts.
Putting up greenboard |
Fully clothed walls |
Dec 25, 2010
Merry Christmas Mold!
For our Christmas post, I present you with unwrapping the tile! We first put plastic tarp and cardboard in the porcelain tub to protect the veneer and prevent bits of tile getting down the drain. We Eric proceeded to shatter the tiles and pry them off. I helped (with three whole tiles).
And... then... a surprise! Underneath all that tile, Eric uncovered a foreign species living amongst us.
I still feel sick when I see this picture.
When you're constructing a shower/tub, some serious waterproofing is necessary to make sure the above doesn't happen. There are a few layers but the first layer is this drywall board. The previous owners had two layers of drywall, while we plan on having one drywall (first) and then one concrete backer board (second).
Enjoy the close up?
Next time... what lies beneath. It's kind of like the skeletal structure of the shower/tub and we're doing reconstructive plastic surgery on it. Now... back to the Star Wars marathon on television.
And... then... a surprise! Underneath all that tile, Eric uncovered a foreign species living amongst us.
Moldy Drywall |
When you're constructing a shower/tub, some serious waterproofing is necessary to make sure the above doesn't happen. There are a few layers but the first layer is this drywall board. The previous owners had two layers of drywall, while we plan on having one drywall (first) and then one concrete backer board (second).
Close up |
Next time... what lies beneath. It's kind of like the skeletal structure of the shower/tub and we're doing reconstructive plastic surgery on it. Now... back to the Star Wars marathon on television.
Dec 11, 2010
First Post
Welcome to our blog! We are chronicling our adventures as we build a life together. Our first major home improvement project has proved to be challenging, but <hopefully!> a valuable investment of time and energy. Our bathroom started out very early '90s (think: white square Dal tile everywhere), except for the fixtures. We're hoping for an updated look that matches our personalities and style better.
With Eric working and me being busy with school, we haven't made the progress we would have liked on our project, but with winter break and vacation coming up, we have great hopes for the next few weeks! For the same reasons, I've been putting off blogging, but I have great hopes for this now that I have some more time as well.
Eric's been super-manly and doing everything himself... I've been helping with what I can - what can I say... I know my way around a kitchen but not really around a hammer. We're working on the bath/shower first. Here, you can see how Eric took the shower doors down. One small step for man, one giant leap for our bathroom.
Next post we'll show you what was living underneath the tile... scary thought, I know.
Before shot #1 |
Before shot #2 |
Before shot #3 |
Eric's been super-manly and doing everything himself... I've been helping with what I can - what can I say... I know my way around a kitchen but not really around a hammer. We're working on the bath/shower first. Here, you can see how Eric took the shower doors down. One small step for man, one giant leap for our bathroom.
No more doors! |
Subscribe to:
Posts (Atom)